The Ultimate Guide to Polymer Clay Baking Times: Master the Art of Perfect Curing
No more guessing. No more burnt blobs. Just beautifully baked pieces, every time.
If you've ever pulled your polymer clay piece out of the oven and thought, “Wait...is this supposed to feel like this?”, you’re not alone.
Cracking, brittleness, and underbaking are common issues, but once you understand a few key tips, you’ll be baking like a pro in no time.
Let’s walk through it together.
Why Baking Time Actually Really Matters
We all pay close attention to the oven temperature (and yep, that’s important!), but baking time is just as big of a deal.
Here’s something that might surprise you:
As long as you're baking at the right temperature, you really can’t overbake polymer clay.
The bigger issue? Not baking long enough. Underbaked pieces might look okay at first but often turn brittle and break down the line.
Properly baked clay should be strong and a little flexible, even if it’s thin.
I’ll let you in on secret, your oven at home lies! I highly recommed getting a oven thermometer to monitor the true temp of your oven during baking.
This thermometer is my favorite and I use this Black and Decker toaster oven.
The Golden Rule: Thickness = Bake Time
It’s not about the brand or the color, it’s all about how thick your piece is. Here's a quick cheat sheet:
Basic Timing by Thickness:
1/8 inch thick: At least 30 minutes
1/4 inch thick: 45–60 minutes
1/2 inch thick: 90 minutes to 2 hours
3/4 inch thick: 2–3 hours
1 inch thick: 3–4 hours
Pro Tip: Always add an extra 15–30 minutes as a buffer. Clay doesn’t burn at the right temp, but it will suffer if underbaked.
Brand-Specific Baking Tips
Every clay brand is slightly different. Here's what to keep in mind:
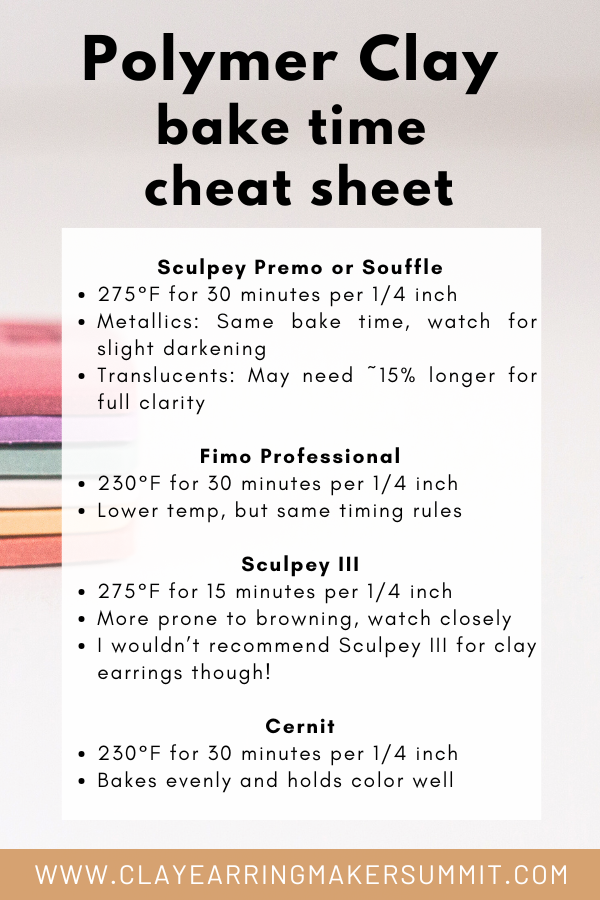
Sculpey Premo or Souffle
275°F for 30 minutes per 1/4 inch
Metallics: Same bake time, watch for slight darkening
Translucents: May need ~15% longer for full clarity
Fimo Professional
230°F for 30 minutes per 1/4 inch
Lower temp, but same timing rules
Sculpey III
275°F for 15 minutes per 1/4 inch
More prone to browning, watch closely
I wouldn’t recommend Sculpey III for clay earrings though!
Cernit
230°F for 30 minutes per 1/4 inch
Bakes evenly and holds color well
Want to Keep Your Colors Bright? Use the Tent Method
Ever had white clay come out a little...yellow-ish? Try this:
Make a little “tent” with aluminum foil
Cover your piece during baking (but don’t let it touch the clay)
It helps heat distribute evenly and protects light colors from browning
This is especially helpful with white, translucent, and light-colored clays.
Advanced Baking Tricks
Multi-Bake Method
Working on a layered or detailed project? Bake it in stages:
Bake your base first
Add more details, then bake again
Make sure each bake meets the time needed for the thickest part
Test Strip Trick
Before committing to your final piece:
Make a small test strip of the same clay and thickness
Bake it with your planned time and temp
Let it cool and test its strength
Adjust as needed for the real deal
Troubleshooting: What Went Wrong?
“My clay is brittle.”
Likely cause: Underbaked.
Fix: Pop it back in the oven for another 30–60 minutes.
Next time: Bake longer from the beginning.
“My clay browned.”
Likely cause: Temp was too high.
Fix: Use an oven thermometer, your oven dial might be lying.
Next time: Try the foil tent and monitor temp closely.
“My clay cracked.”
Likely cause: Air bubbles or not enough conditioning.
Fix: Condition more thoroughly and bake gradually.
Next time: You can sometimes patch cracks with liquid clay, don’t give up!
Bonus: Make a Baking Log
Every oven is different, so start tracking what works best for you.
Use a notebook, printable, or even a phone note. Here’s a simple log template:
Project: ____________
Clay Brand: ____________
Thickness: ____________
Temperature: ____________
Time: ____________
Result: ____________
Notes: ____________
What the Pros Know: Patience Wins
The artists who consistently get great results?
They never rush the bake time.
They know:
Longer bakes = stronger clay
A well-baked piece will last for years
Your Easy Checklist for Perfect Baking
Use an oven thermometer (non-negotiable!)
Start with longer times
Keep a baking log
Test your pieces
Use the foil tent for light colors
The Bottom Line
There’s no magic formula, but once you understand the why behind baking, it becomes way less scary.
Don’t let fear of overbaking hold you back, polymer clay is more forgiving than you think.
When in doubt, bake longer.
Got questions or want to share your favorite baking trick? Hop over to our free Facebook community full of polymer clay earring makers like yourself!


